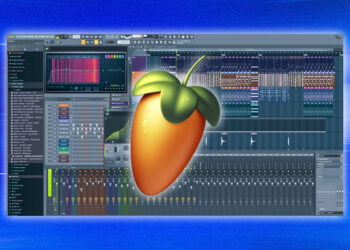
Music production software such as FL Studio has become increasingly popular in the past few years, allowing producers to create professional-grade music from the comfort of their own home.
One of the most important aspects of music production is making sure that different samples or sounds you use within your track are in time with the tempo that you are working in.
This process, known as fitting a sample to tempo, can be somewhat intimidating for beginner music producers, but with a few simple steps, it can be an easy process.
In this blog post, we will discuss how to fit a sample to tempo in FL Studio.
We will cover the different methods available, enabling you to fit samples to the tempo of your track with ease and accuracy.
We will also discuss the importance of tempo and how it will affect your production when it comes to fitting samples.
By the end of this blog post, you will have all of the knowledge and skills necessary to ensure that you are fitting your samples to the tempo of your track.
Open the sample in FL Studio
The first step in fitting a sample to tempo in FL Studio is to open the sample.
To do this, you will need to navigate to the “Samples” tab in the browser window.
Once you have found the sample you want to use, simply drag it into the project window.
This will open the sample and give you the ability to edit it.
You can adjust the start and end points of the sample, as well as the volume and pitch.
Once you have the sample set up to your desired specifications, you can then fit it to the tempo of your project.
Analyze the sample for tempo
Once you have identified the tempo of the sample, the next step is to analyze the sample for tempo.
This is done by playing the sample and tapping along with it.
You can either use a metronome or a drum pattern to help with this.
Make sure to find the natural rhythm of the sample and note the tempo.
Once you have done this, you can now use the tempo slider in the sample window to get it in sync with the master tempo.
This will ensure that your sample will be in tempo with your track.
Set the tempo for the sample
Once you’ve loaded your sample into FL Studio, the next step is to set the tempo.
This is a crucial step for making sure your sample fits to the tempo of the song.
To set the tempo, click on the “tempo” button in the transport section of the main toolbar.
This will open up a window where you can enter the tempo of the song.
Make sure you enter the exact tempo of the song so that your sample will fit properly.
When you’re done setting the tempo, press “OK” and your sample will now be synced with the tempo of the song.
Slice the sample
Now that you’ve loaded your sample into the Channel Rack, it’s time to slice it to the tempo.
To do this, click the “Slice the sample” button, which can be found at the bottom of the sample’s Menu.
This will break your sample into pieces that match the current tempo of your project, allowing you to use the pieces individually and modify them without affecting the entire sample.
When you’re finished slicing, you can drag and drop the new slices from the Browser window into FL Studio’s Playlist window.
Press the ‘Make Tempo From Slices’ button
Once you’ve sliced your sample and set its length, you can press the “Make Tempo From Slices” button in FL Studio.
This will automatically detect the tempo of the sample and set it accordingly.
You can also use this button if you need to make minor adjustments to the tempo of the sample.
To do this, simply adjust the sample’s length, then press the “Make Tempo From Slices” button.
This will automatically adjust the tempo of the sample to match the new length.
Delete any empty slices
After you’ve adjusted the sample to the tempo of your song, you should delete any empty slices that may have been created.
To do this, open the sample in the piano roll window, right-click on the sample, and select “Delete empty slices”.
This will make sure there are no empty spaces in the sample, and no unnecessary sound will be added to your track.
Select the ‘Fit To Tempo’ button
Once you have the sample loaded into your project, click the “Fit to Tempo” button on the left side of the sample editor window.
This will automatically adjust the length of the sample to match the tempo of your project, making it easier to work with.
Additionally, you can adjust the pitch of the sample to match the tempo by clicking the “Pitch” button next to the “Fit to Tempo” button.
This will ensure that the sample blends in seamlessly with the rest of your project.
Export the sample with the adjusted tempo
Once you have adjusted the tempo of the sample, you will need to export it in order to save your changes.
To do this, navigate to the File menu, select Export, and choose Audio File.
This will open the Export Audio dialog window, allowing you to select an output format and destination for the sample.
Once you are happy with the settings, simply click OK to export the sample with the adjusted tempo.
Conclusion
In conclusion, fitting a sample to tempo in FL Studio is a great way to make sure all of your samples are in time and in sync with your beat.
By using the Fruity Slicer, you can easily adjust the length of each sample and fit it to the tempo of your project.
With a little practice, you can quickly and easily create professional sounding beats with the perfect tempo.


