For the aspiring producer and musician, routing tracks together in a digital audio workstation (DAW) is an important part of creating a cohesive mix.
While there are many DAWs out there, FL Studio is one of the most popular.
With its intuitive user interface and powerful capabilities, FL Studio is a great choice for both beginners and experienced producers.
In this blog post, we’ll look at how to route tracks in FL Studio, and discuss the different options available to you for organizing and mixing your project.
We’ll also take a look at how to use the different routing options available in the software to get the best sound possible.
So, whether you’re just starting out with FL Studio, or you’ve been using it for a while, this blog post will provide you with an in-depth look at how to route tracks in the software effectively.
Understanding the Mixer
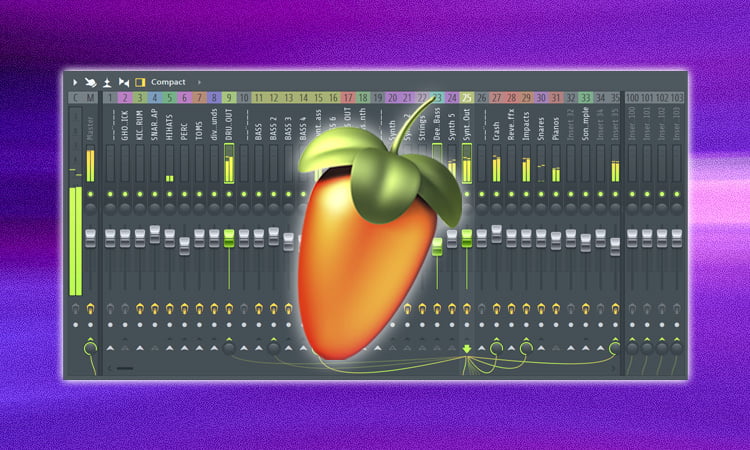
The Mixer is the heart of FL Studio, and understanding it is essential for producing great music.
The Mixer allows you to route each track to the appropriate effect, EQ, and other processing tools, and it’s where you’ll adjust the levels of each track to get the perfect mix.
The Mixer also allows you to automate certain parameters, such as panning, volume, and effect settings, which can be invaluable in crafting your mix.
In order to effectively use the Mixer, you need to be familiar with its various functions, such as track routing and automation.
Creating a New Track
To create a new track in FL Studio, you’ll need to go to the Browser Window.
From there, select the “Audio” tab, which will open a list of audio files you can use for your track.
Once you’ve selected the audio file of your choice, you’ll need to drag it into the Channel Rack, which will create a new track.
You can then use the tools available in the Mixer to adjust the volume, panning, and other parameters of the track before you get to work on the beat.
Setting up the Instrument
After you have written your music, the next step is setting up the instrument.
This involves assigning MIDI devices and/or virtual instruments to each track, and setting up the mixer and effects.
To assign a MIDI device, click on the instrument icon on the step sequencer.
Then select the MIDI device you want to use, and map the MIDI channels to each track.
For virtual instruments, you can use the “channels” button to assign each track to a different virtual instrument.
Finally, set up the mixer and effects to get the sound you want.
You can add reverb, delay, and other effects to each track and adjust the levels, panning, and other settings.
Adding Effects to the Track
Adding effects to your track is a great way to take it to the next level.
Effects like reverb, delay, and chorus can create a larger soundscape and make your track sound even more professional.
To add effects to a track in FL Studio, start by selecting the track you want to add effects to from the Mixer panel.
Then, go to the Effects window and select the effect you want.
Once you’ve chosen the effect, click the Add button, and you’ll see the effect applied to the track in the Mixer panel.
You can adjust the effect’s parameters to get the desired sound.
Finally, press the Play button and enjoy your new track!
Recording Audio with the Track
After you have set up your tracks and loaded your instruments, it’s time to record audio.
To do so, you will need to use the Record button in the transport section of FL Studio.
Once you have clicked Record, FL Studio will begin recording whatever sound is coming through your computer’s soundcard.
You can also arm additional tracks for recording by pressing the small red circle next to the track’s name.
Be sure to turn off any tracks that you do not want to record audio for before you press Record.
When you are finished recording, press the Stop button and you will have your audio recording.
Arranging the Track in the Playlist
Now that you’ve chosen the tracks for your playlist, it’s time to arrange them.
Arranging tracks involves deciding which order they’ll play in and how long each track will last.
This helps you create a smooth, consistent mix.
In FL Studio, the playlist window is where you can arrange and edit your tracks.
To add a track to the playlist, simply drag it from the browser window and drop it into the playlist window.
You can then drag the tracks around to rearrange them, and adjust their length by dragging the ends of each track.
Additionally, you can use the controls at the top of the playlist window to copy, paste, delete, and undo your changes.
Automating the Track
Automating the Track is a great way to customize your song and change the sound of your mix.
This process involves creating automated parameters and adjusting them over time in the track.
Automating a track allows you to change the volume of the track, its effects, and other parameters like resonance and cutoff.
To automate a track, you first need to create an automation clip in the clip view of the track.
From the clip view, you can select the parameters you want to automate.
After selecting the parameters, you can draw in the automation curve you want and adjust the points of the curve to customize the automation pattern.
Automating a track can be a great way to add dynamic changes to your mix and give your song a unique sound.
Rendering the Track as an Audio File
After routing all your tracks in FL Studio, it’s time to render the track as an audio file.
To do this, go to the File menu and select the Render option.
This will bring up the Render dialog box, where you can select the output format and folder for the audio file.
For the best quality, select WAV as the output format, and then choose the destination folder for the audio file.
Once you have the output format and destination folder selected, click the Render button to start the rendering process.
When the rendering is complete, you will have a high-quality audio file that’s ready to be played back or edited further.
Conclusion
In conclusion, routing tracks in FL Studio is a powerful feature that allows users to create complex mixes and hybrid sounds.
Routing audio and midi tracks to external effects, virtual instruments, and hardware controllers can open up a whole new world of creative sound design options.
With a little practice and experimentation, you can quickly learn how to route tracks in FL Studio and unlock the full potential of your music production capabilities.


