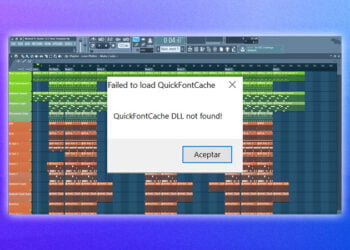
If you are a music producer, chances are you have heard of FL Studio.
The iconic program’s user interface is simply recognizable, and its powerful tools are highly sought after in the music industry.
This digital audio workstation (DAW) is renowned for its intuitive tools and workflow, making it a favorite of producers of all skill levels.
Even for experienced users, however, FL Studio’s updates can be confusing and intimidating.
Knowing how to update FL Studio to the newest version is an important part of keeping your workflow running smoothly.
In this blog post, we’ll look at how to update FL Studio with all the newest features and improvements.
We’ll also examine some tips and tricks to ensure that your process is as quick and easy as possible.
Whether you’re a seasoned veteran or a beginner, this blog post is sure to offer helpful insights into the world of FL Studio.
Open FL Studio
To update FL Studio, the first step is to open the FL Studio application.
On PC, you can find the application in the Start menu or by searching for “FL Studio” in the search box.
On Mac, you can find the application in the Applications folder or by searching in the Spotlight.
Once you have opened the application, the update process will begin automatically.
If there are any updates available, you will be prompted to install them.
Check for updates
Once you open FL Studio on your computer, the first step is to check for updates.
You can do this by clicking on the ‘Help’ tab at the top of the window and then selecting ‘Check for Updates.
’ If an update is available, you will be notified and can then choose to install it.
Be sure to read the release notes so you know what changes were made before you install the update.
It’s also a good idea to back up your project before installing any updates, just in case something goes wrong.
Download the latest version
Once you have checked for updates, the next step is to download the latest version.
You can do this from the FL Studio website.
Simply click the ‘Download’ button, then select the version you would like to download.
Once the download is complete, open the file and follow the instructions for installation.
Make sure to follow all the steps carefully to ensure everything goes smoothly.
After that, you should be able to launch the latest version of FL Studio.
Install the update
Once you have backed up all your settings, the next step is to install the update.
Simply download the installer from the Image-Line website and run the program.
Depending on the size of the update, it may take a few minutes to complete the installation.
When it is finished, the program will automatically restart and the new version of FL Studio will be ready to use.
Run the update
Now that you’ve downloaded the update, it’s time to actually run it.
Open the downloaded file and accept the license agreement.
Once you’ve done that, the installation process will begin.
Depending on your computer and the size of the update, this could take a few minutes.
Once the update is complete, you should see a message that tells you the update was successful.
Press “OK” and you’re done!
Congratulations, you’ve now successfully updated FL Studio.
Restart FL Studio
When it comes to updating FL Studio, the sixth step is to restart the software.
Once the updates have been completed, you will need to restart the program to ensure the changes take effect.
To do this, you can either exit the program and reopen it, or use the File>Exit option in the software.
Once your FL Studio has been restarted, the new updates will be applied and you can begin using the updated features.
Activate the new version
Once you have finished downloading and installing the new version of FL Studio, you need to activate it for full use.
To activate your new version, head over to your FL Studio account.
Log in, or create an account if you don’t have one.
Once you’re logged in, navigate to the activation page.
You will be prompted to enter your serial number, which was provided to you when you purchased the software.
After entering your serial number, click the “Activate” button to activate your new version.
Enjoy the new features
After the update is complete, you can start taking advantage of all the new features that come along with FL Studio!
From improved audio and mixing capabilities, to intuitive new workflow improvements, you can find something new and exciting to explore.
Don’t forget to take advantage of the new instrument sounds, effects, and sample packs, as well as advanced editing functions.
Whether or not you’re a beginner or an experienced user, you’ll find something new in each update!
Conclusion
In conclusion, updating FL Studio is quite simple and easy.
All you have to do is download the latest version, install it, and launch the software.
Once your version is up-to-date, you can enjoy new features, bug fixes, and improved performance.
Upgrading FL Studio is important to ensure that you are using the latest version of the software and to get the most out of it.


