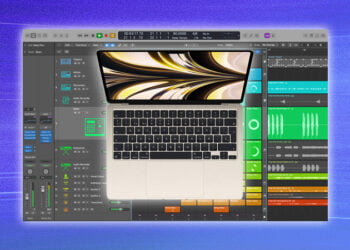
Logic Pro X is the latest version of Logic Pro, Apple’s sophisticated music production software that allows users to produce, record, and mix music and audio.
On top of its industry standard features, Logic Pro X has added powerful new tools and an intuitive design to make it even easier for professionals and hobbyists alike to create music.
In this blog post, we’ll walk through the basics of Logic Pro X, discuss its many features and capabilities, and offer tips on how to best use the software.
We’ll also go over how to navigate the interface and how to begin using the software to create professional-level music.
With a few helpful tips and a more advanced look at the features of Logic Pro X, anyone can start creating amazing music right away.
Navigating the interface
Learning how to navigate the interface in Logic Pro X is an essential first step in using this powerful software.
The main window can appear intimidating at first, but don’t worry – it’s easy once you get the hang of it.
To begin, locate the Toolbar at the top of the window.
This contains all of the main controls, such as Transport, Mixer and View buttons.
The Track List is located on the left-hand side of the window and displays all of the tracks that you are working with.
The workspace is located in the center of the window, where you can arrange, edit and play audio files.
Finally, the Inspector is located on the right-hand side, where you can customize properties for the audio files you are working with.
Now that you know the basics, you are ready to explore Logic Pro X further.
Setting up tracks
Once you have your project created, it’s time to set up tracks for recording or for adding your own sounds.
To add tracks, simply click on the “+” button located at the top of the page in the main window.
You will get a menu with all the available track types.
Choose one and then set the number of tracks you want to add.
You can also assign each track a type, like audio, MIDI and software instrument.
Once you’ve done that, you can start adding sounds to the tracks, adjusting their settings and recording.
Recording audio
Recording audio in Logic Pro X is straightforward and simple.
To begin, set up your microphone or instrument and make sure it’s connected to your computer.
Next, open Logic Pro X and select a track for your recording.
The track will appear in the arrange window.
You can then begin recording by pressing the record button located in the transport bar.
When you’re finished, you can listen to your recording by pressing the play button.
You can also edit and mix your recordings using Logic Pro X’s editing tools.
Adding midi tracks
Adding midi tracks in Logic Pro X is an easy process.
Begin by selecting the plus (+) icon in the Track Header and choose MIDI Track.
This will open up a new window with a variety of options.
You can select the type of instrument you would like to use, as well as any additional effects you may want to add.
Once all of your settings have been chosen, click create and Logic Pro X will generate a new midi track.
You can then begin recording your midi performance, or use the piano roll to manually input notes.
Mixing and mastering
Mixing and mastering are essential components of the audio production process.
Mixing is the process of balancing, blending, and arranging the individual audio tracks in a mix.
This includes adjusting the volume levels, panning, and adding effects.
The goal is to make the final mix sound unified and polished.
Mastering is the process of taking the final mix and further enhancing it for release.
This includes adjusting the EQ, compression, and limiting to give the track more volume and clarity.
Both mixing and mastering need to be done carefully and with an experienced ear to ensure the highest quality sound.
Adding effects and plugins
Once you’ve laid down the basics for your song in Logic Pro X, it’s time to start adding effects and plugins.
There are a multitude of effects available in Logic Pro X, ranging from EQs, reverbs, compressors, and delays, to more specialized ones like chorus, flangers, auto-pan, and vocoders.
You can also download third-party plugins from other companies and add them to your project.
With the wide array of available effects, you can transform your track and make it sound unique.
Experimentation is key; try different combinations and see what sort of sounds you can come up with.
Exporting your work
Once you have completed all the editing, mixing, and mastering of your project in Logic Pro X, you are ready to export your work.
Exporting is the process of transferring and saving your project as a high-quality audio file.
To do this, select the entire audio region in your project, then go to “File” and choose “Export > Selected Region As Audio File.”
This will open a window where you can choose the format, bit depth, and sample rate of the file.
Once you have chosen your desired settings, click “Export” to save the file.
You can then use this file for further distribution, such as uploading to streaming services or burning to a CD.
Customizing the workspace
Customizing the workspace in Logic Pro X is a breeze.
You can easily resize and reposition windows and interface elements with a few clicks of the mouse.
To reposition windows, simply click and drag the title bar of the window you want to move.
To resize, click and drag the bottom right corner of the window to adjust the size.
You can also quickly minimize and maximize the window by clicking the minimize and maximize buttons in the top left corner of the window.
Once you’ve found your ideal workspace, you can save it as a preset for future use.
Conclusion
To conclude, Logic Pro X is an incredibly powerful piece of music production software.
It offers a user-friendly interface and a wide range of tools and features for creating, mixing, and mastering professional-level music.
With its intuitive design, Logic Pro X makes it easy for anyone to create high-quality music quickly and efficiently.
Whether you’re a beginner or a seasoned veteran, Logic Pro X will help you get the most out of your music production.


